Open Settings from the Dock, the app bar at the bottom of the screen. Select
Configurations under Workspace Settings, then Objects.If your workspace shows a Data Model app, open Objects there instead.Admin access is required.The Objects page lists two objects: Company and Person. Select one to open its field
and priority editor.
Objects list
The Objects page shows the two available object types. Select one to open its configuration.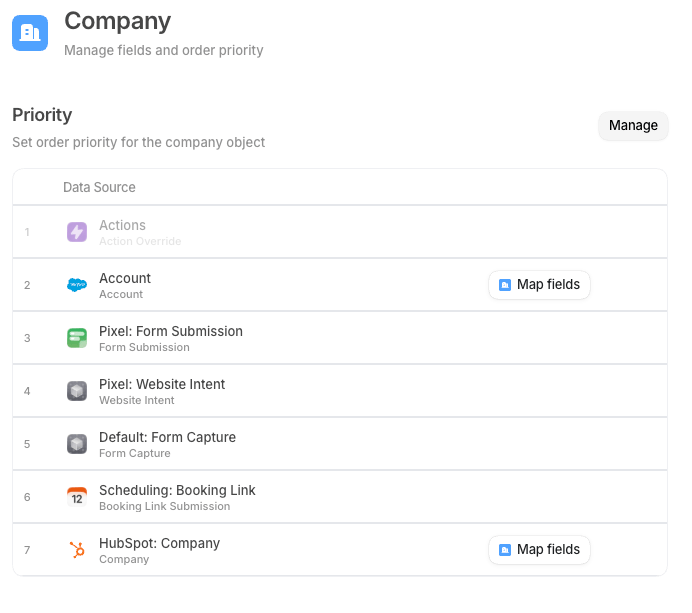
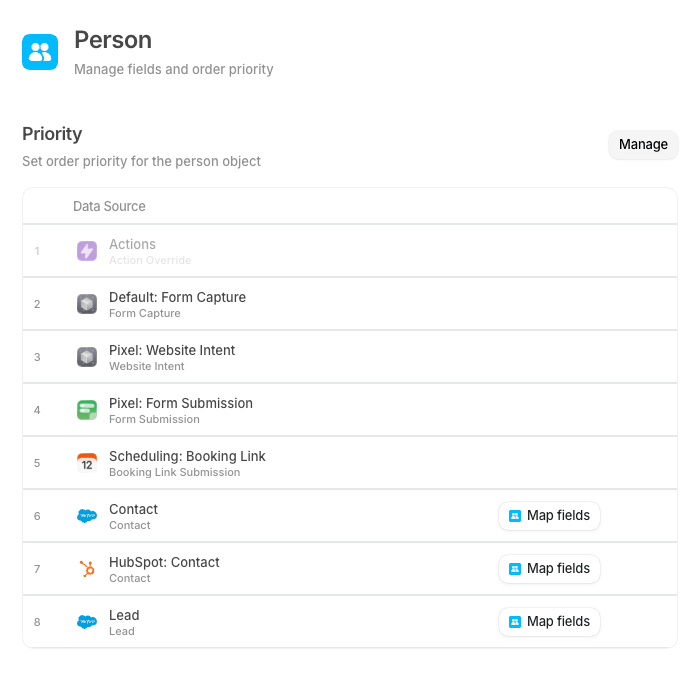
Priority
Each object page opens with a Priority section at the top. This is the workspace-level source order, which applies to every field on the object. To fill any field on this object, Default tries your data sources in the order listed here. It stops at the first source that returns a value. The first row is always Actions. This is a manual override, so a value set there wins over every connected source. You cannot reorder or remove Actions. Only admins can set an override value.Add and remove data sources
Select Manage to open the data source picker. The picker shows all enrichment providers and any CRM objects your workspace has connected via Integrations. Toggle a source to add or remove it. Sources you add appear at the bottom of the priority list. Drag sources to reorder them. The available data sources depend on which integrations are connected:- Enrichment providers: Clearbit, Apollo, and People Data Labs are available when connected.
- CRM sources: Salesforce and HubSpot objects, such as
Salesforce: LeadorHubSpot: Contact, appear when those integrations are healthy. Each CRM source exposes the object types it supports for the selected destination object, Company or Person.
A data source with a warning indicator was disconnected after it was added. It stays in the
priority list to preserve your field mappings, but returns no values until you reconnect the
integration.
Reorder data sources
Drag any row except Actions to change its position. Rows higher in the list take priority. Default stages unsaved changes locally. Select Save in the header to apply them.Map fields (CRM sources)
For CRM sources, a Map fields button appears on the row. Select it to open the mapping dialog. In the dialog, map each Default field to its matching field in the CRM object. For example, map Default’semail field to Salesforce’s Email field on the Lead object.
Mappings tell Default exactly which CRM field to read when the CRM is the winning source for a
given field.
Fields
Below Priority, the Fields section lists every field defined on the object. Each field shows its name, data type, and the data source icons that contribute to it in priority order.Standard fields
Standard fields ship with Default and represent the most common properties for each object. Person standard fields
Company standard fields
Custom fields
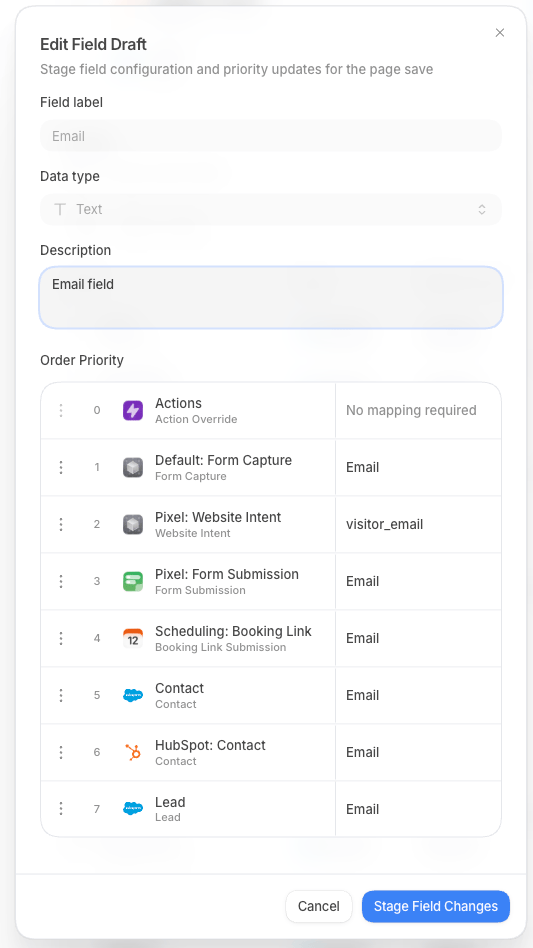
Select Add custom field to create a field that is not in the standard set. The field configuration dialog has the following options:
When you change the order, a Priority overridden alert appears above the list. Select
Reset to return to the workspace-level order.
To edit a field, open the row’s context menu. Select Edit field.
To delete a custom field, open the row’s context menu. Select Delete field.
Deleting a custom field removes it from all records. You cannot undo this.
You can delete only custom fields. Standard fields are part of the Default data model.You cannot remove standard fields, but you can configure which sources fill them.
Search fields
Use the search bar above the fields table to filter by field name or description. This is useful on objects with many custom fields.