

Add a node in the Workflows builder with Add Node. Then pick one of the nodes below.Many fields accept data from the trigger or an earlier node. Type
{{ to open the variable
picker.Send to Webhook
Sends an HTTP request to a URL you choose. Use it to push data to a system Default does not connect to natively. The endpoint must be reachable on the public internet overhttp or https. Default blocks
requests to localhost and to private or internal network addresses.
Request
Authorization controls how Default authenticates. Choose one option:
- None
- API Key: you set an API Key and a Header Name. The default header name is
X-API-Key. - Token: you set a Bearer Token.
- Basic: you set a Username and a Password.
{{ to insert a value.
Default sends a body only with POST, PUT, PATCH, and DELETE.
Prepare response fields before the first run
Example response tells Default which fields the endpoint can return. Add one when a later node needs a value from the response. For example, a billing platform can return a customer ID after the webhook creates a customer. Add that response shape now, then use the returned ID in a later CRM node. You do not need to send real customer data before you can finish the workflow.An example describes the expected response. It does not send the request, test your
authorization, or guarantee the live response.
1
Enter the endpoint
Choose Request Type and enter Request URL. Generate becomes available after you
enter the URL.
2
Generate an example
Select Generate. Default reads the public API documentation for the request method and
URL. The draft can take up to 60 seconds.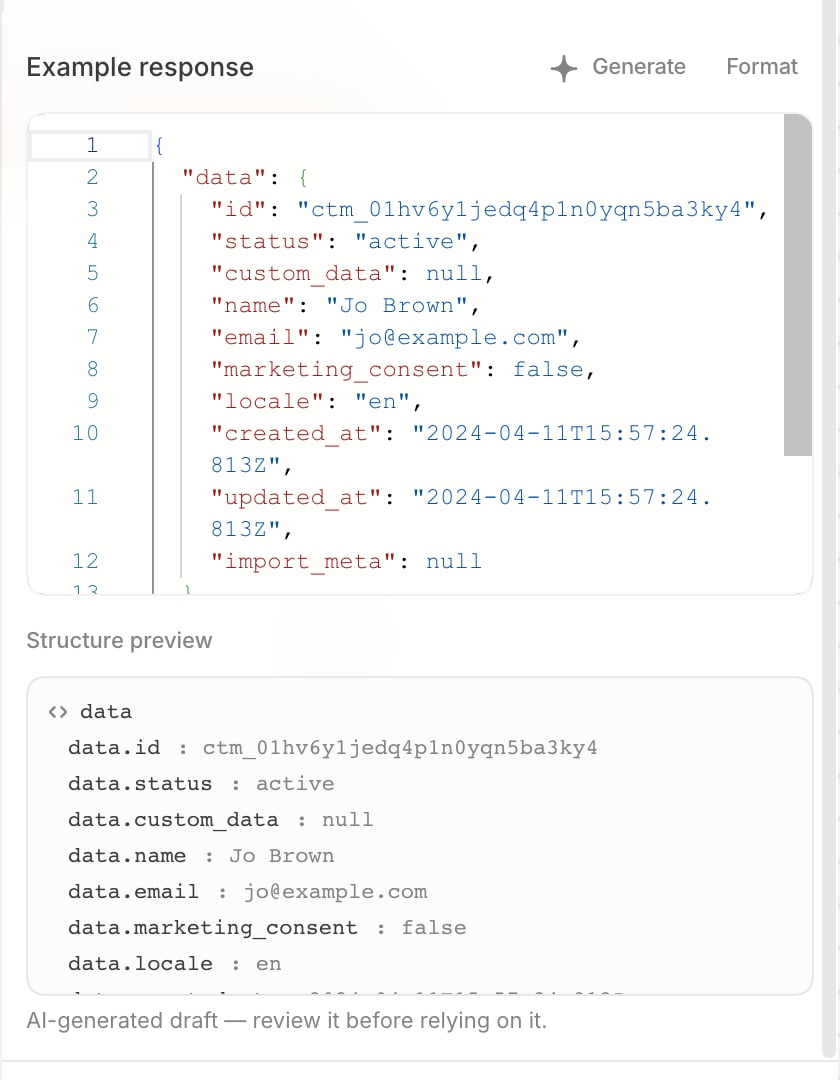
3
Review the draft
Check the field names, nesting, and value types. Edit the JSON if the response you expect is
different.Default marks a generated example with AI-generated draft — review it before relying on
it. The note clears after your first edit.If Default cannot find a documented response, it leaves Example response unchanged. You
can paste valid JSON instead.
4
Use a returned field
Add Create Variable after Send to Webhook. Enter 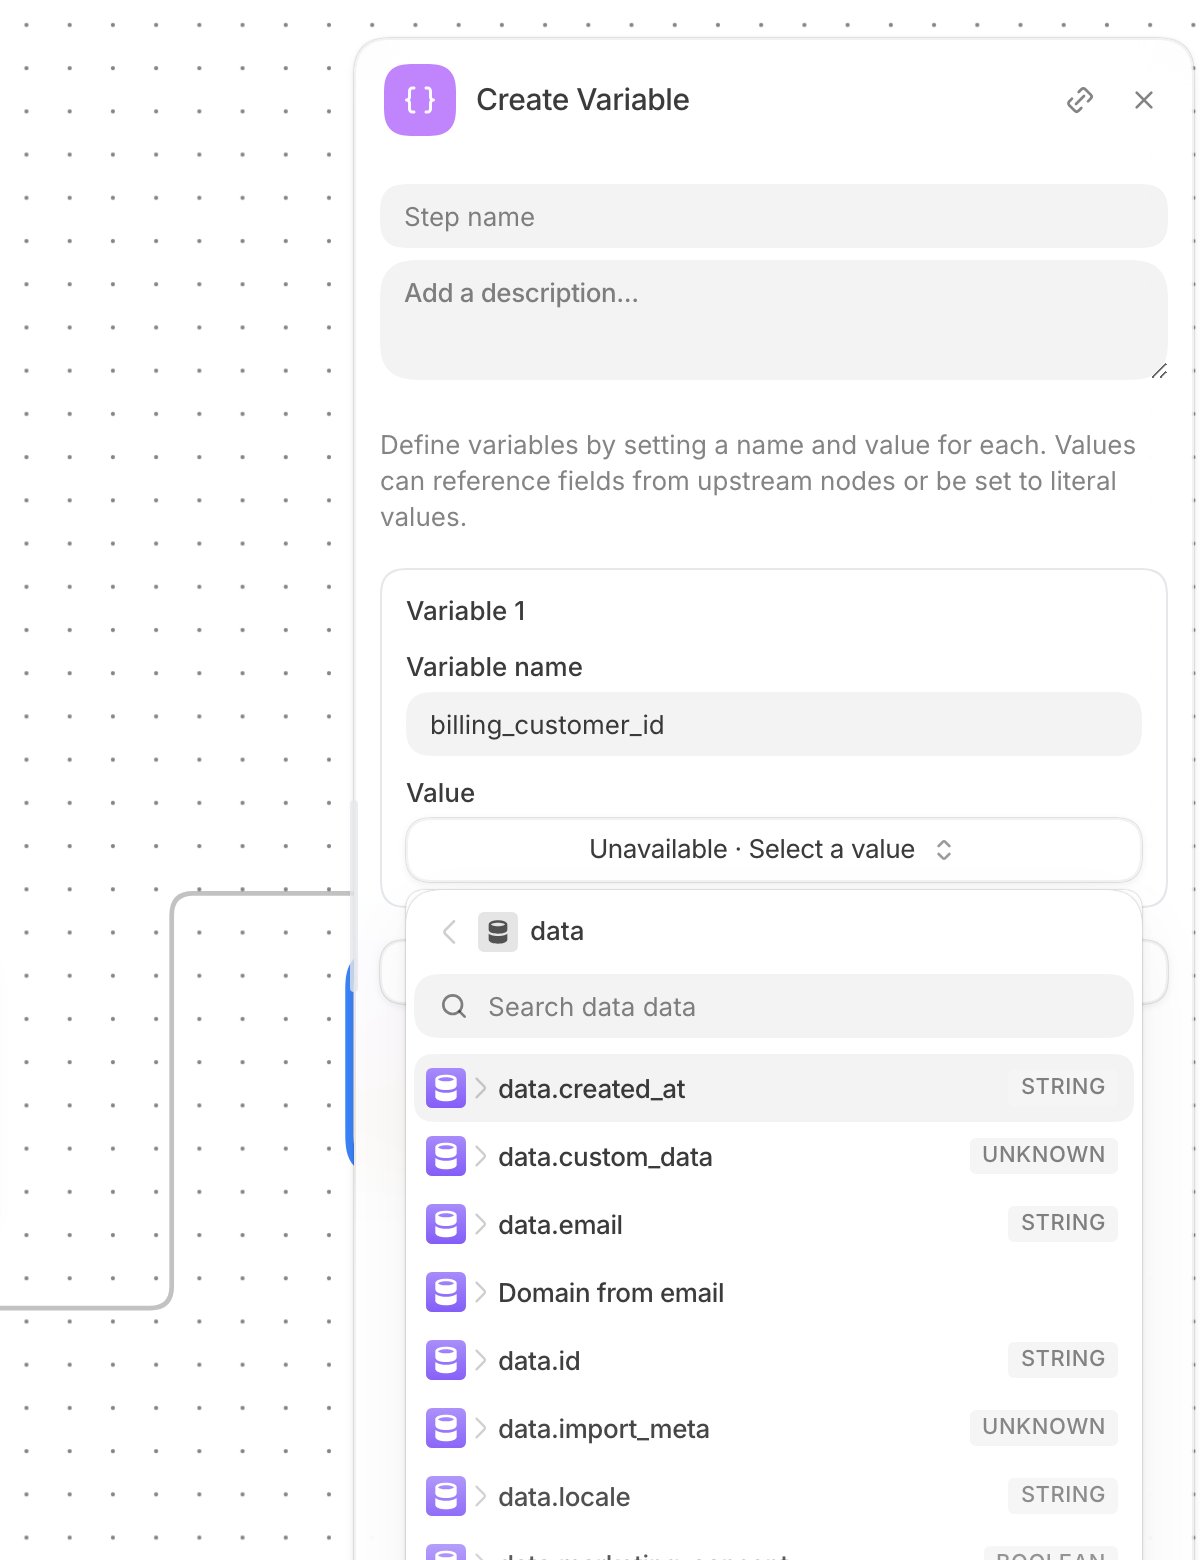
billing_customer_id for
Variable name. For Value, select Response, data, then data.id.Redirect
Sends the visitor’s browser to a URL. Useful at the end of a form-driven workflow.Date Transformer
Shifts a date forward or backward and saves the result for later nodes. You can add more than one transform. For each transform:
For example, set Input date to the meeting time, Before, Days, and Amount
1.
Set Output name to reminder_time to get the day before the meeting for a reminder node.
Create Variable
Defines one or more named variables you can reuse in later nodes. Each variable’s value can reference data from an earlier node or be a fixed value you type in.
Select Add variable to define another one in the same node.
For example, set
campaign_name to a fixed value. Set lead_score to a value an enrichment
node produced.
Then reference both in a later CRM or notification node.