

Open the Routing app from the Dock, then select Rules of Engagement.You need admin access to create, edit, or publish a ruleset. Evaluation logs also require admin
access.
How a ruleset decides
Rules run from top to bottom. The first rule that matches wins, so place narrow rules above broad rules. Each rule has three parts:
If a rule needs an input that the workflow did not provide, Default skips that rule. The workflow
continues, and the evaluation log identifies the missing input.
The workflow step has its own Fallback queue. This is different from a rule’s Fallback:
- A rule’s Fallback applies after that rule matches but its target cannot resolve.
- The step’s Fallback queue applies when the whole ruleset finishes without an owner. It returns the queue, but it does not select a member from that queue.
- A rule that routes to No one is final. The step does not use its fallback queue.
What the workflow receives
Example: route inbound Salesforce leads
This guide builds one reusable decision for a workflow that starts when Salesforce creates a Lead. It uses two standard Lead fields:- Country
- Number of Employees
Enterprise EMEA. It sends other EMEA leads to
a member of EMEA Growth. Leads outside EMEA go to manual review on the workflow’s Else branch.
Before you begin:
- Connect Salesforce in Settings → Integrations.
- Create the
Enterprise EMEAandEMEA Growthqueues. - Confirm that each queue has members and a routing policy.
Create and publish the ruleset
1
Create the ruleset
Open Routing from the Dock and select Rules of Engagement.Select New ruleset. Enter
Inbound lead territory in Ruleset name, then select
Create.2
Declare the Salesforce inputs
Select Manage sources, then Add source. Under CRM, choose Salesforce, then
choose the Lead object.In the Salesforce Lead source, select Add field. Add the country field and the employee
count field from your Salesforce schema. Select Save inputs.Declaring these fields makes their names and value types available to every rule in this
ruleset. The workflow maps live Lead values into them later.
3
Add the specific enterprise rule
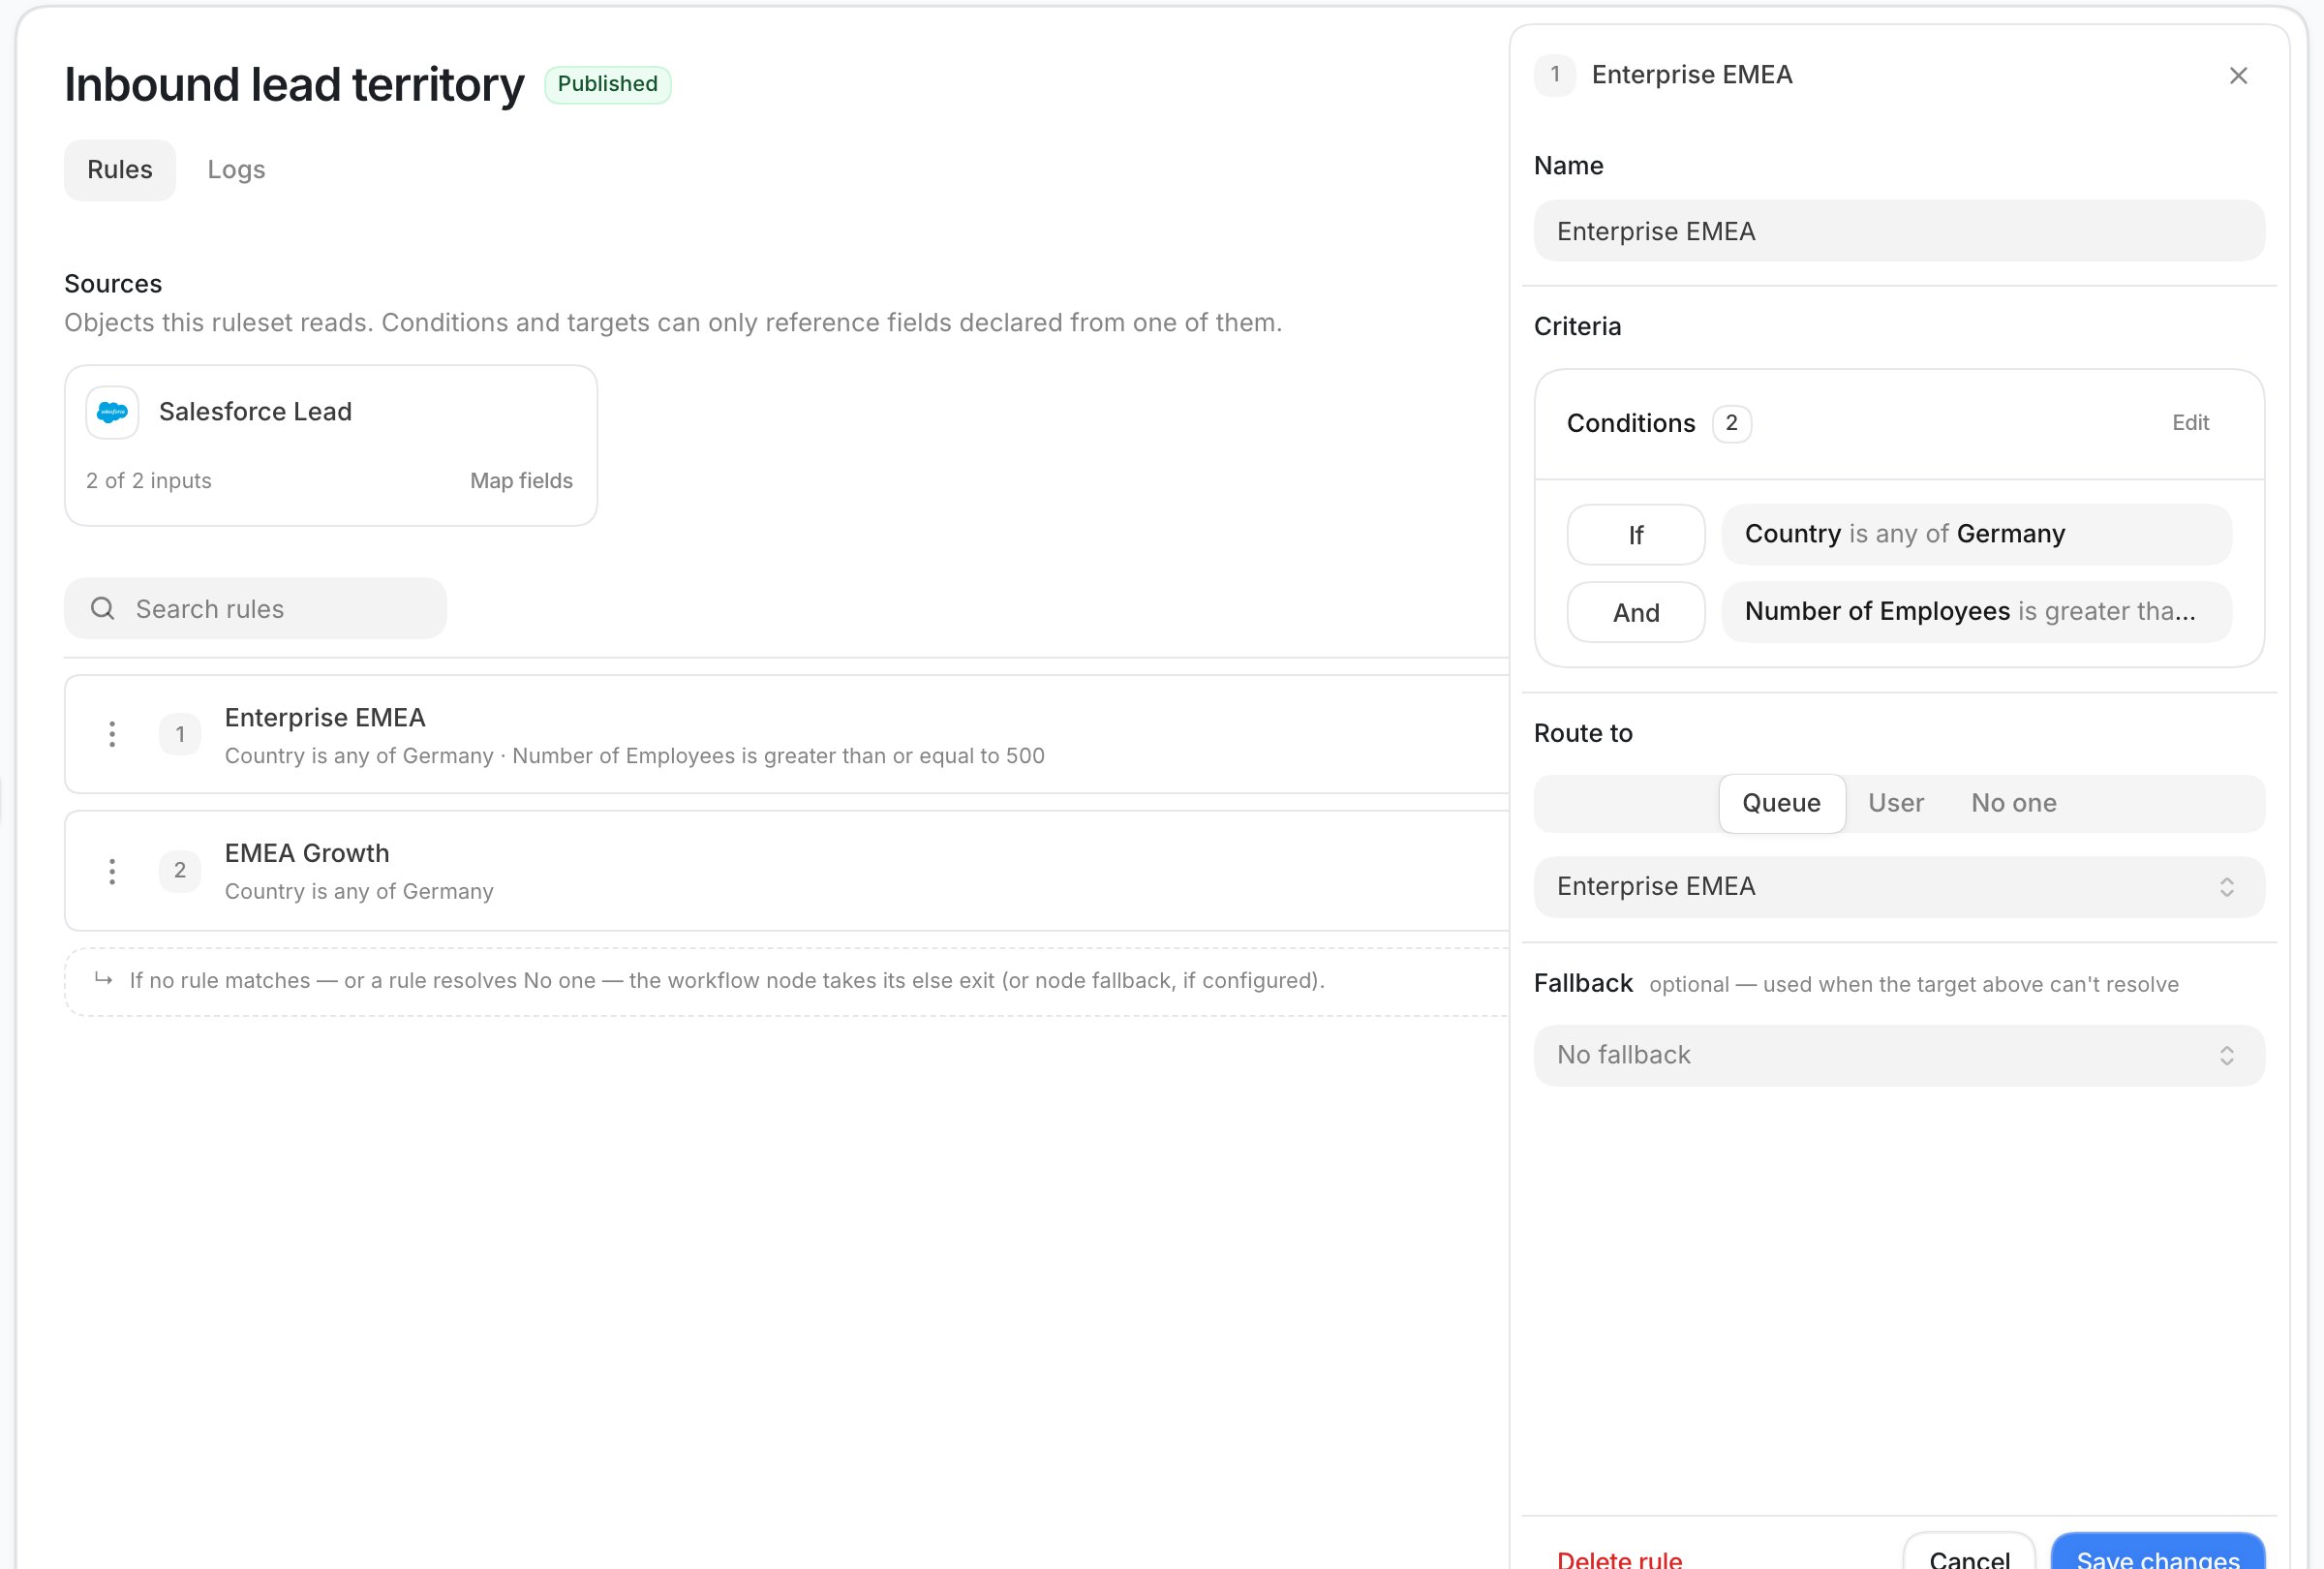
Select New rule and name it
Enterprise EMEA.Under Criteria, open Match when. Set the rule to match your EMEA countries and an
employee count of at least 500.Under Route to, select Queue, then choose Enterprise EMEA. Select Save changes.4
Add the broader EMEA rule
Select New rule and name it
EMEA Growth.Under Criteria, open Match when. Use the same EMEA country list without the employee
count condition.Under Route to, select Queue, then choose EMEA Growth. Select Save changes.5
Check the order and publish
Keep
Enterprise EMEA above EMEA Growth. The enterprise rule is more specific, and the first
matching rule wins.Drag a rule by its handle to change the order. Then select Publish.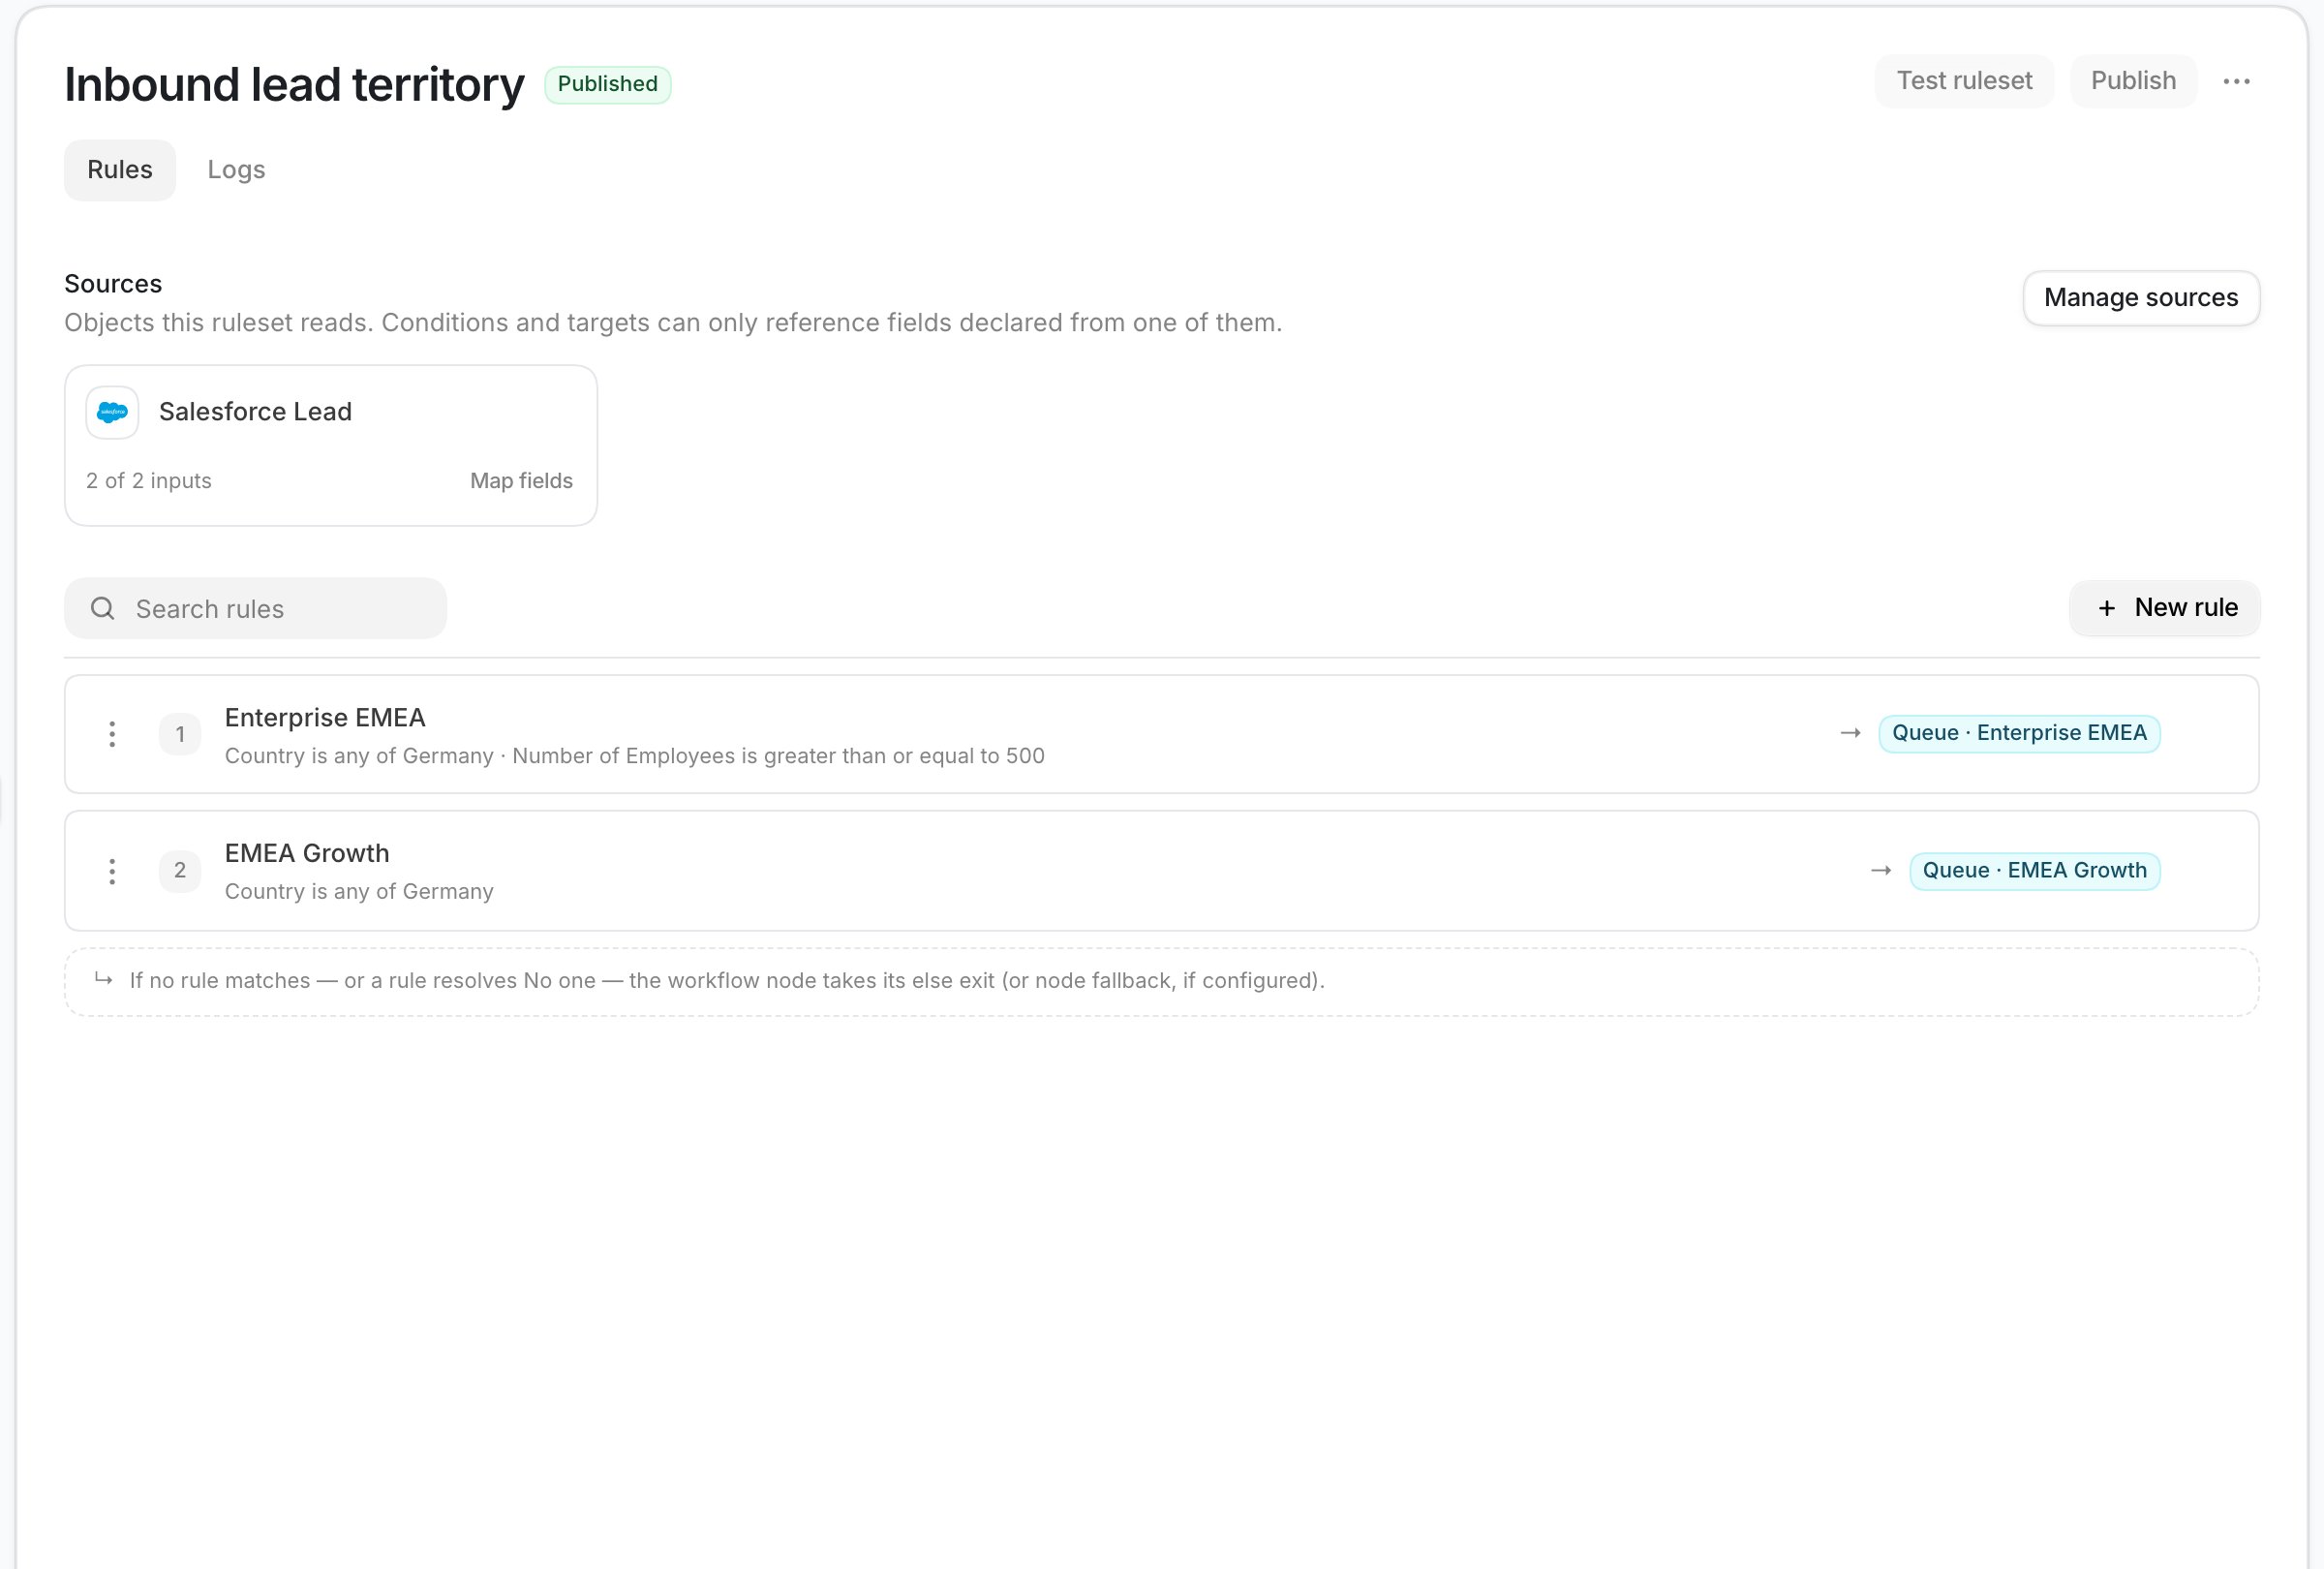
Use the ruleset in a workflow
1
Start from a Salesforce Lead
Open Workflows and create a workflow named
Route new Salesforce leads.Add the CRM Record Created trigger. Set CRM to Salesforce and Record to the Lead
object.2
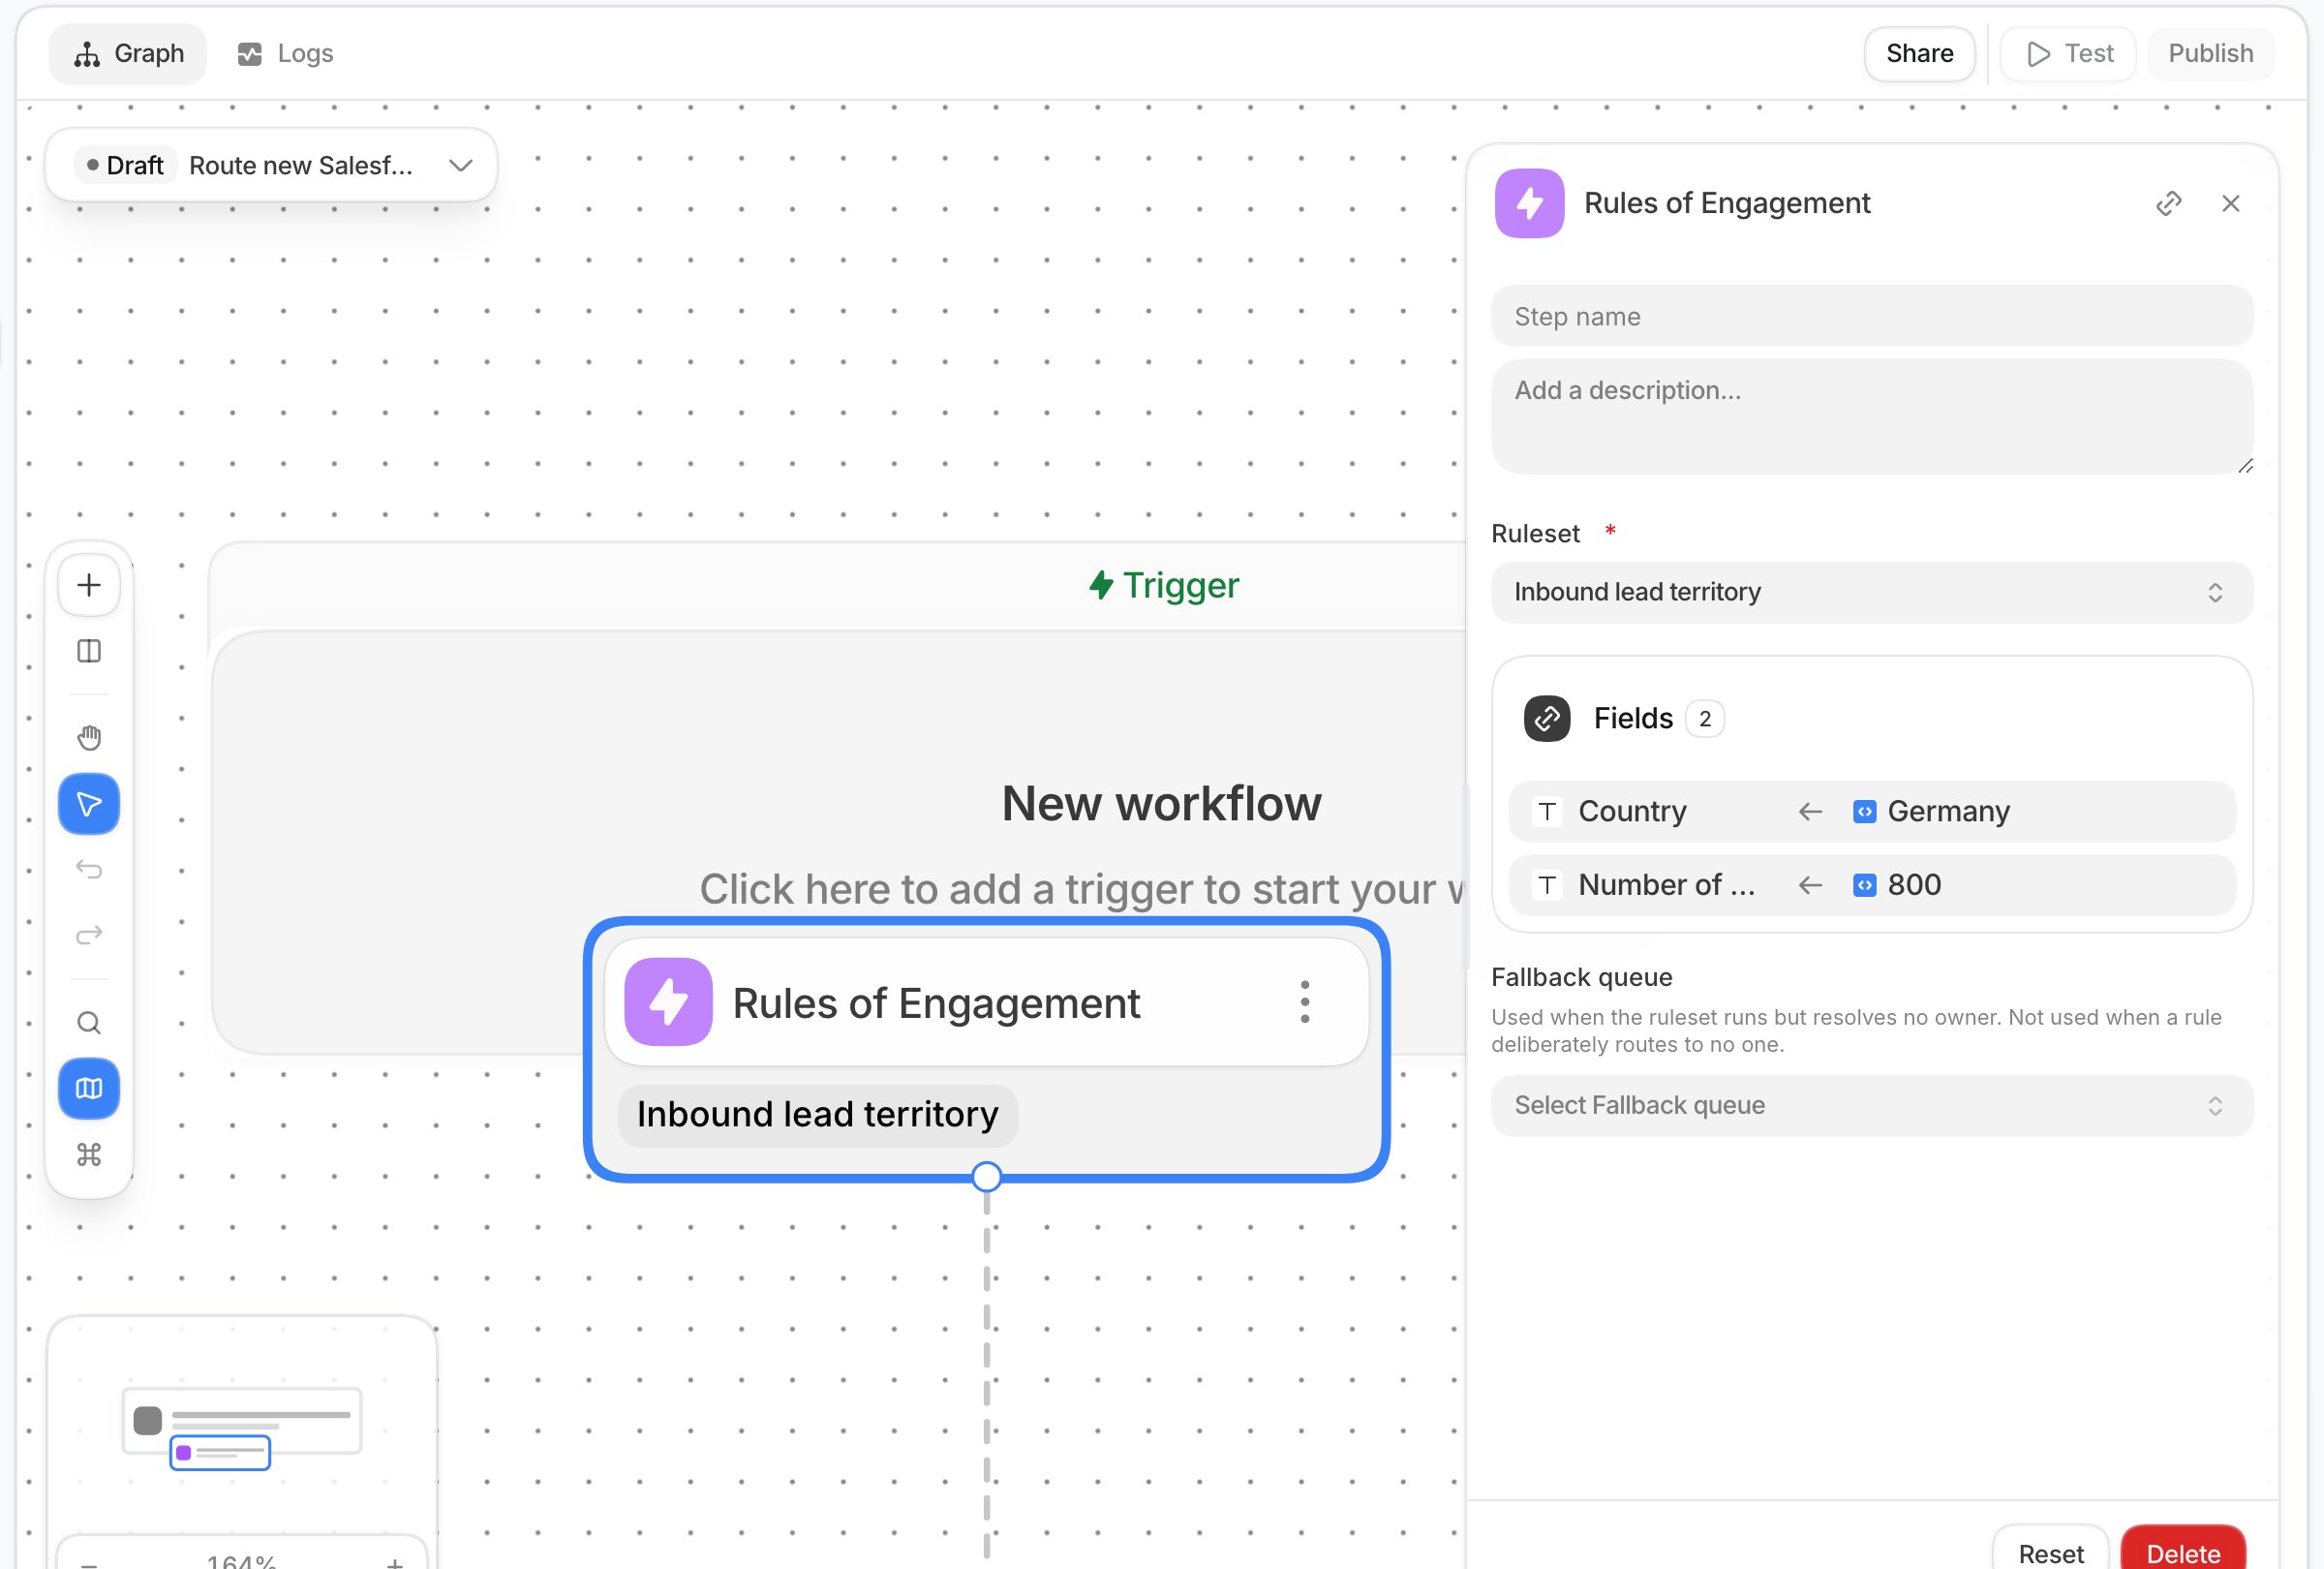
Add Rules of Engagement
Select Add Node, then add Rules of Engagement from the Actions section.Set Ruleset to
Inbound lead territory.3
Map the live Lead fields
Under Inputs, map the Salesforce Lead’s country to the ruleset’s country input. Map the
employee count to the ruleset’s employee-count input.Leave Fallback queue empty. This workflow needs a person, so unmatched leads will use the
Else branch instead.
4
Set the Salesforce owner
Connect the Resolved branch to an Update Record step.Set Platform to Salesforce and Record Type to the Lead object. Choose the Lead from
the trigger under Record to update. Under Fields, map the Salesforce owner field to the
resolved user from Rules of Engagement.
5
Handle the Else branch
Connect the Else branch to the action your team uses for manual review. For example, send a
Slack message to Revenue Operations.The Else branch runs when the step cannot make a routing decision. A deleted or unpublished
ruleset also takes this branch.
Test the complete route
1
Open the workflow test
Select Test to open Test Workflow. Choose the CRM Record Created trigger.
2
Run three test records
Use test Salesforce Leads and run these cases:
Select Run Test for each case. Confirm that the Rules of Engagement step takes
the expected branch. For a resolved case, confirm that Update Record receives the selected
member and updates the Lead owner.
3
Publish the workflow
After all three cases pass, select Publish. Turn on Enabled when you are ready for live
Salesforce Leads to run through the workflow.
Review a routing decision
Open the ruleset and select Logs. The table shows recent evaluations with these columns:- Source and Time identify where and when the decision ran.
- Resolved to shows the queue or user selected.
- Matched rule shows which rule won.
- Outcome shows User, Queue, No one, or Unresolved.
- Version shows the published ruleset version used for that decision.
- The input values the ruleset received.
- Input problems, such as a type mismatch or an undeclared value.
- Every rule from the evaluated version, in evaluation order.
- Whether each rule matched, did not match, lacked an input, or was not reached.