

Open the Scheduling app from the Dock, then select an entry under Events
in the Scheduling sidebar. Each entry opens the same unified events list.
The events list
All event types share one list. The table groups events by type and shows a Favorites group at the top. The table shows each event’s name, Status, Duration, Last edited, Last used, Pre buffer, Post buffer, and Intervals. Select a column header to sort by it.- The Status switch turns an event on or off without opening it. Turning an event off shows an Event deactivated toast with an Undo action.
- Hover over an event’s name for a Booking links button (see Booking links).
- If you host the event, your own booking link shows below the event name. Select it to copy the link.
- Each row’s menu has Duplicate and Delete. Deleting stops the event’s booking links, so Default asks you to confirm.
- If workflows use the event, Default lists the workflows that you must update before you can delete the event.
- The toolbar has a Search events box and filters for Status and Duration.
Create an event
1
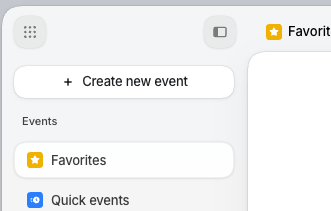
Open the dialog
Select Create new event.
2
Name the event
Enter an Event name. The name is required.
3
Choose the event type
Choose the event type for the meeting.
4
Create the event
Select Create new event again. Default creates the event.
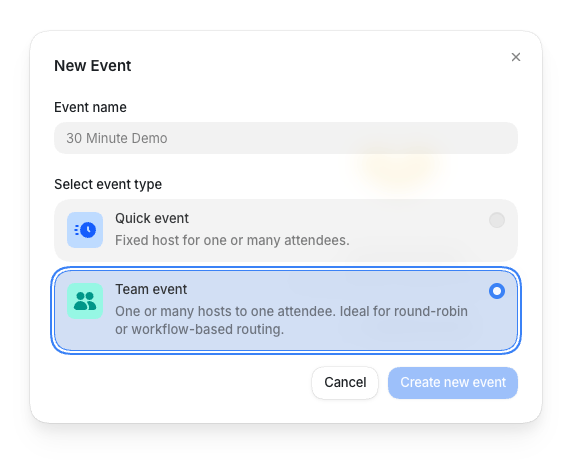
Any member can create a Quick event. Team events require permission to create shared
events.
If you cannot select Team event, ask an admin for Scheduling event access.
After you create the event, Default opens the event editor. Work through its setting sections
from top to bottom.
The live preview on the right updates as you go. The editor header shows Unsaved changes
until you select Save, then Published.
If someone else edits the same event while you have it open, Default asks whether to
Keep my edits or Refresh.
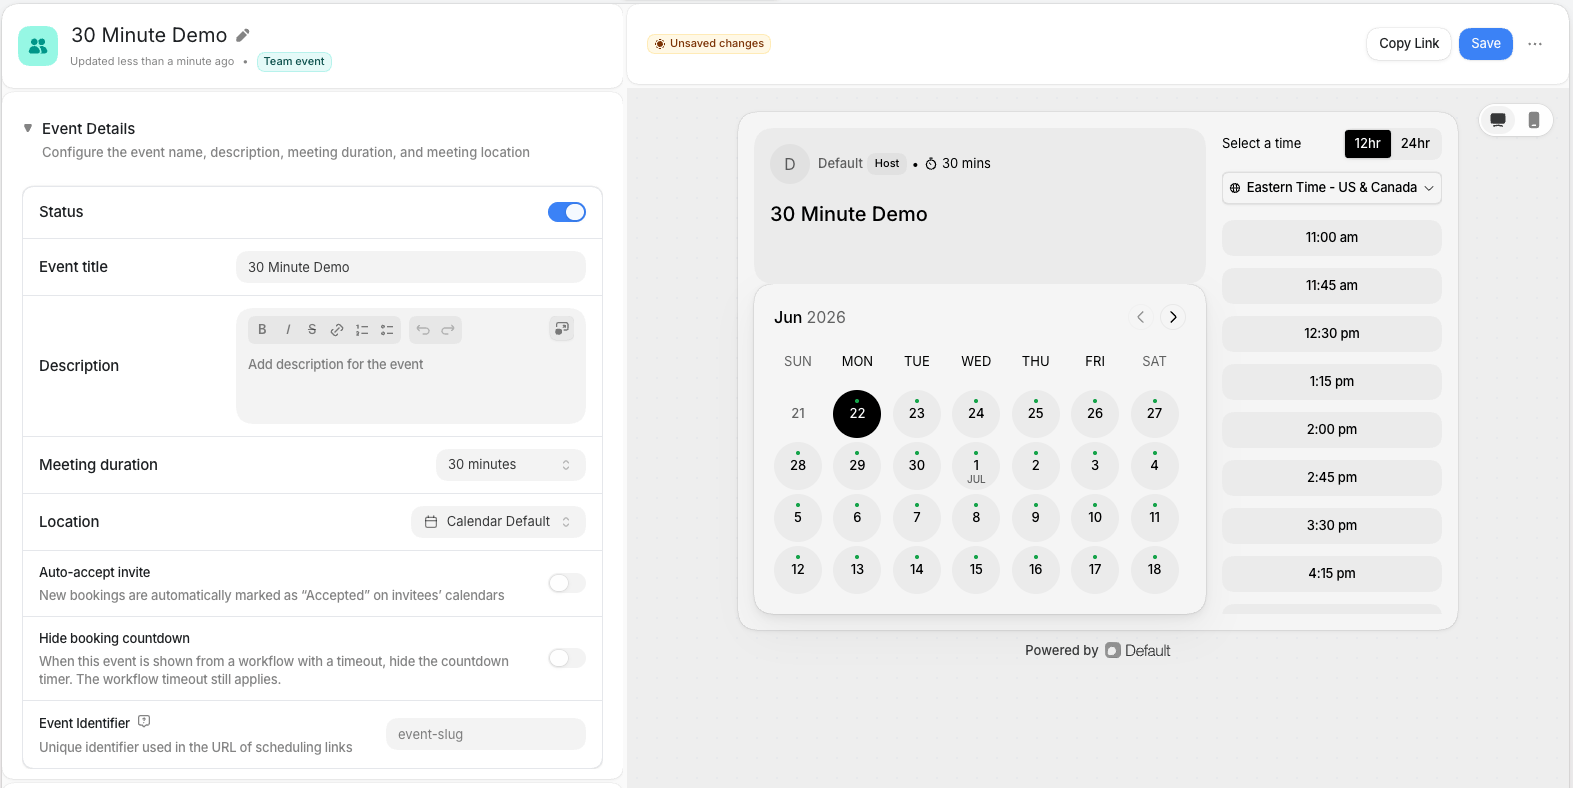
The event editor: setting sections on the left, a live booking-page preview on the right.
Event details
Use Event Details to control the public booking page basics and a few booking-page behaviors.
The Location setting decides where the meeting happens. Choose your calendar’s default
conferencing, Zoom, Zoom Personal, or In Person. Picking In Person reveals Ignore OOO, which
lets people book over your out-of-office time while other meetings still block.
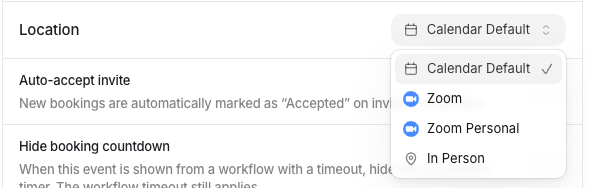
The Location menu: Calendar Default, Zoom, Zoom Personal, or In Person.
Conferencing options depend on connected integrations. Calendar Default uses the host’s calendar
provider settings, and Zoom options require a connected Zoom integration.
Hosts and attendees
Use Hosts and Attendees to decide who runs the meeting and who else can join.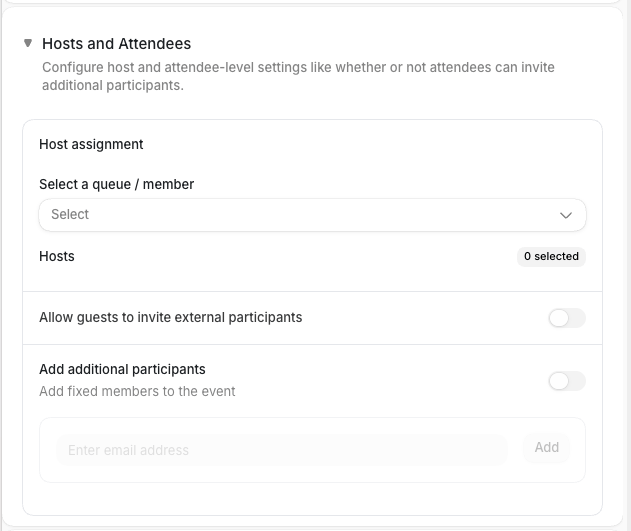
Scheduling and availability
Use Scheduling and Availability to control when people can book and which hours are available.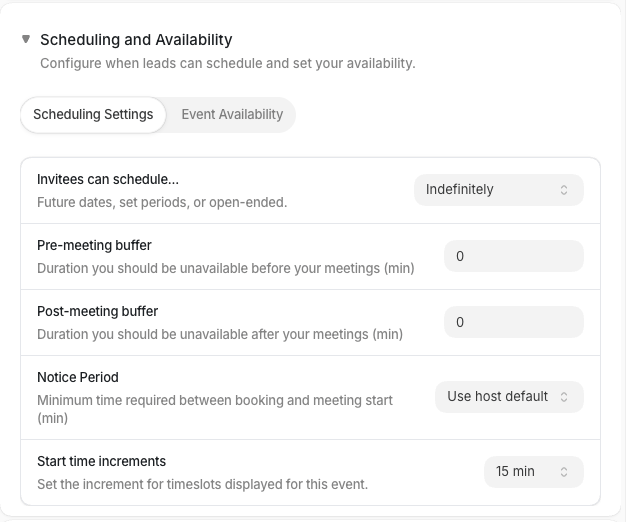
Scheduling settings
The Scheduling Settings tab controls booking windows, buffers, notice, and slot increments.Event availability
By default, the event uses each host’s working hours from their availability settings. Turn on Set custom hours to override that schedule for this event.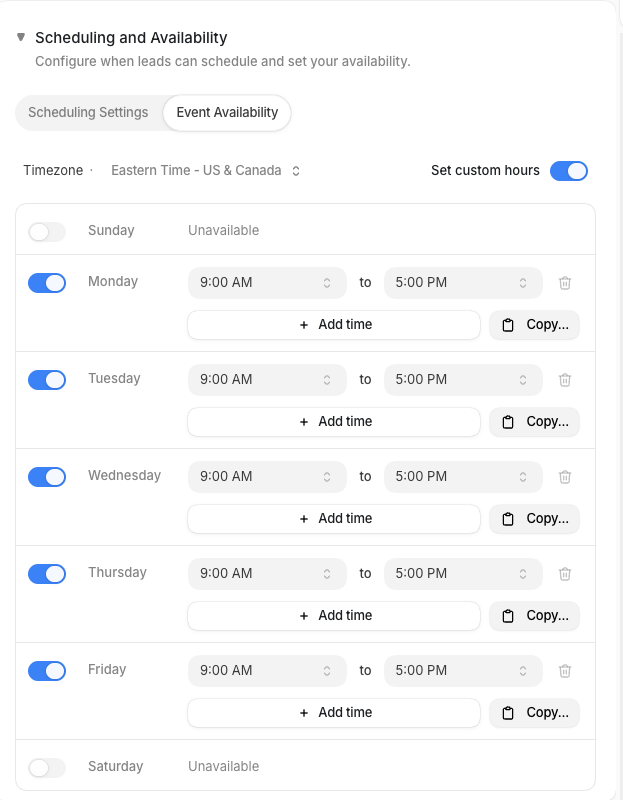
Booking form questions
Use Booking Form Questions to decide what the booker must answer before confirming a meeting. Default adds the Email question automatically. Email is always required to process an event booking.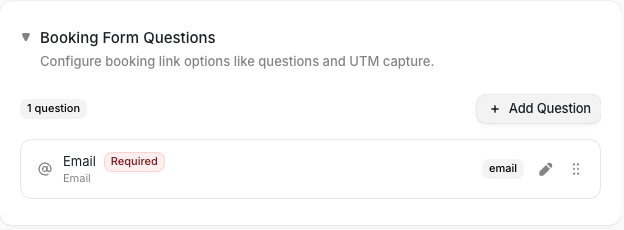
Questions can collect email, phone, URL, number, text, textarea, single-select, and
multi-select answers. The answer type depends on the field you choose.
Drag questions to reorder them.
Phone collection and SMS consent for leads
Use a Phone Number question to collect a lead phone number during booking. Guest SMS is on when a guest-facing message in the event’s Messages section uses a template with the SMS channel enabled. Examples are the booking confirmation and a guest reminder. You configure channels on the template itself, in the workspace Messages library. When guest SMS notifications are on for the event, the booking form shows SMS consent helper text directly below the phone field:- “By providing your phone number you agree to receive texts from this organization about any scheduled events.”
- “See our privacy policy.”
Text STOP).
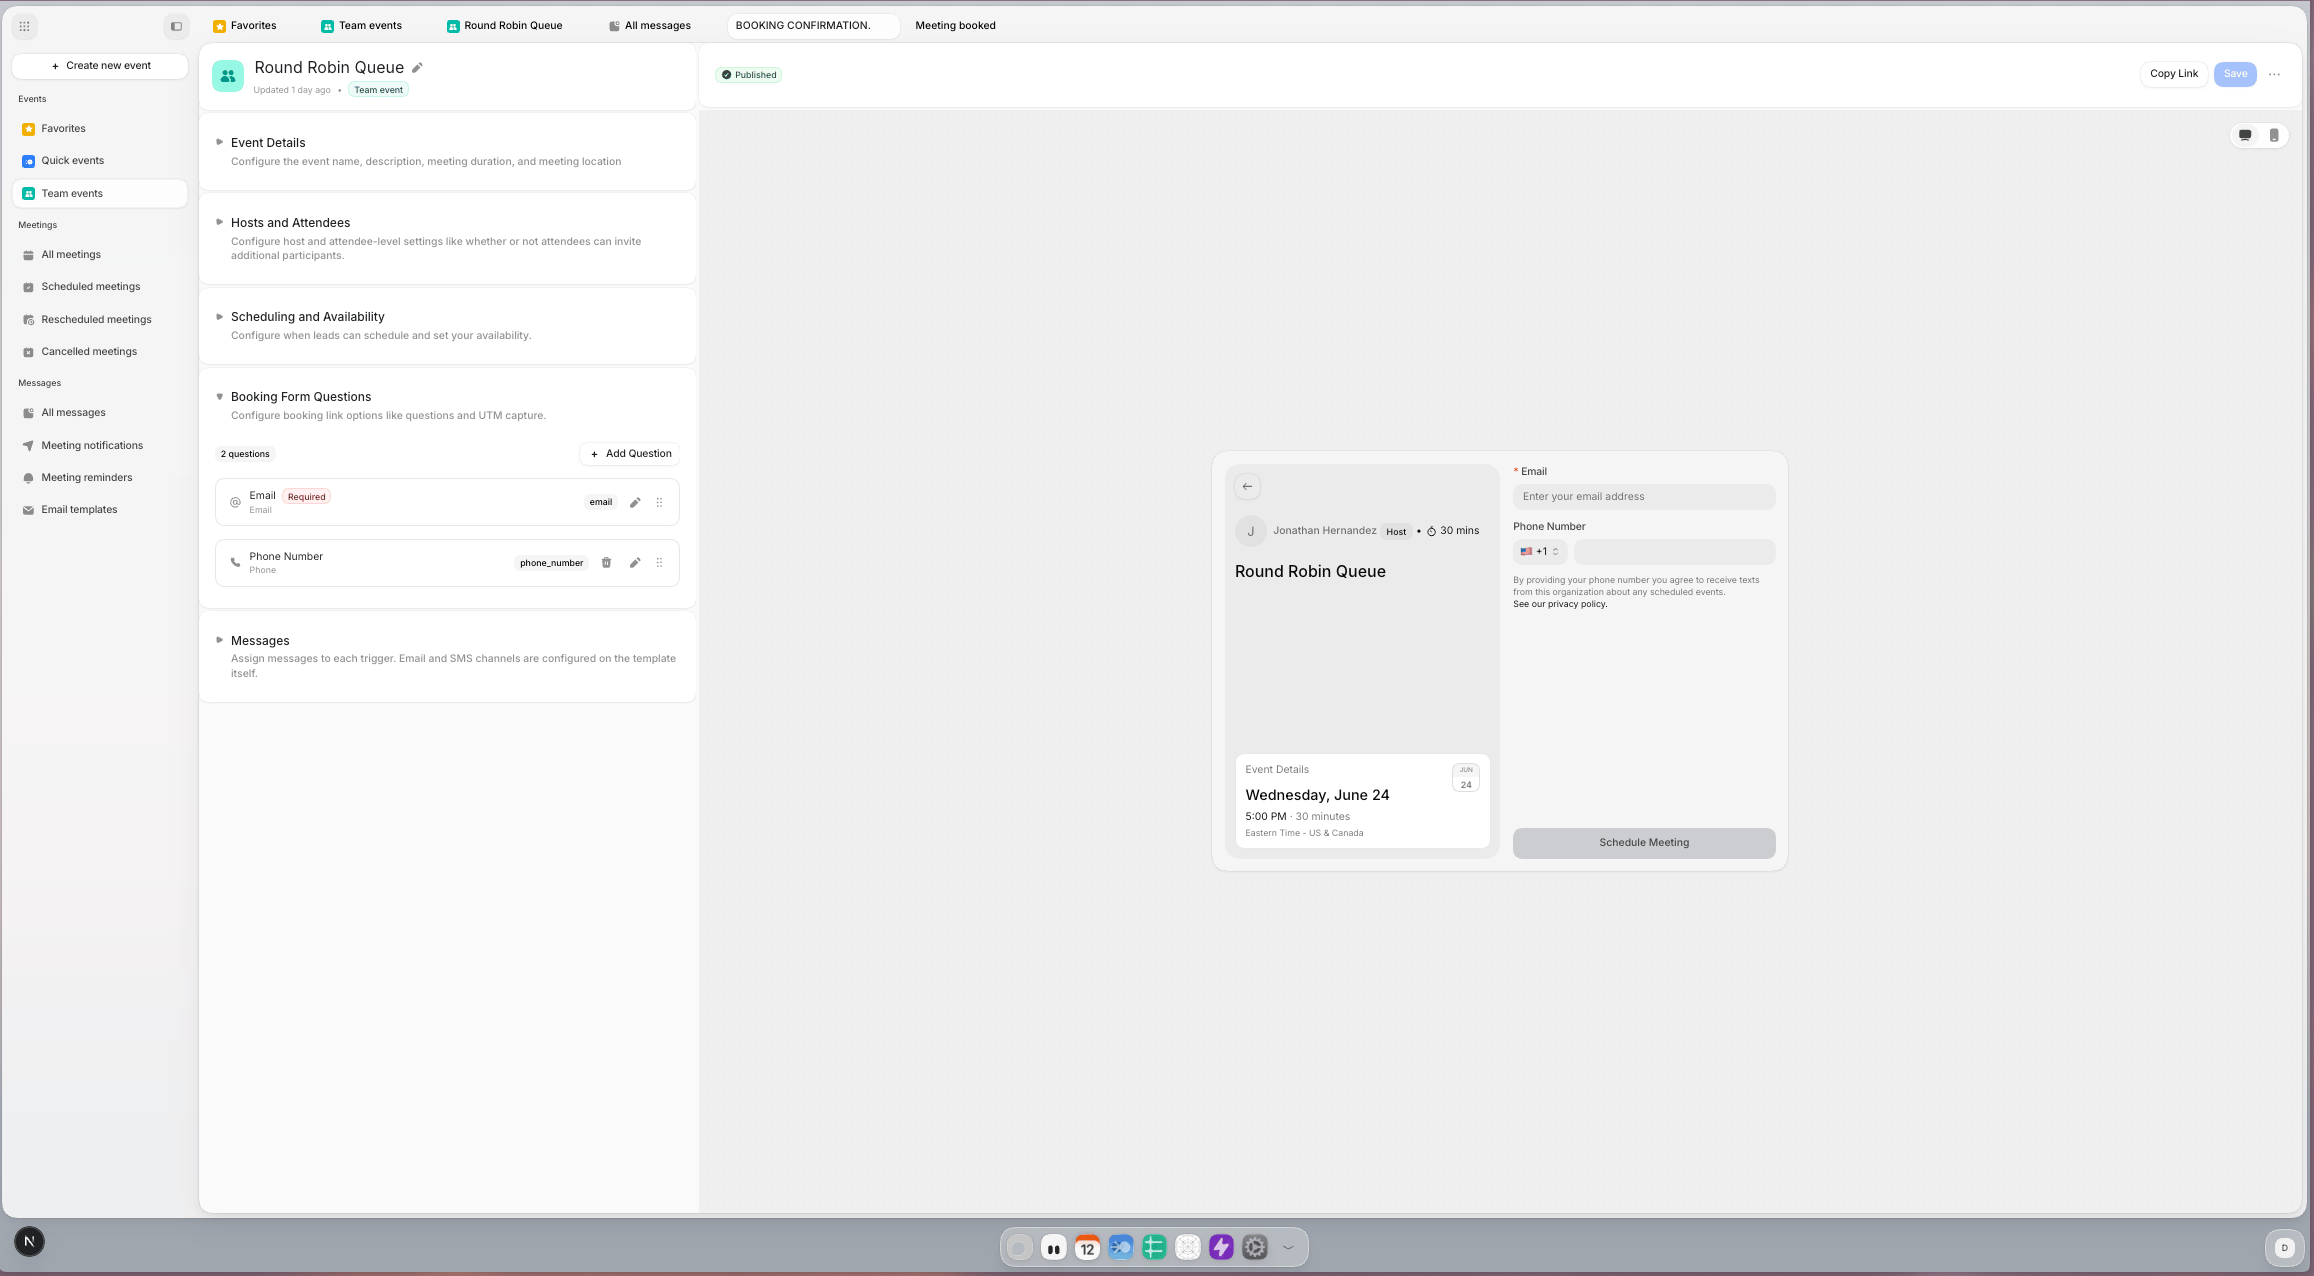
Booking Form Questions with a Phone Number field enabled.
Messages
Use Messages to control what Default sends around this event’s meetings. You assign a message to each trigger. You configure the email and SMS channels on the message template, in the workspace Messages library. The section has three tabs: Calendar invite, Notifications, and Reminders.Calendar invite
Set the Calendar event title and Calendar event description. Default uses these values on the calendar event that it creates after booking. The values can differ from the public booking page title and description. Both fields support scheduling variables, grouped as Guest variables, Host variables, and Meeting variables.Where guest variables get their values
Guest variables fill from more than one source. Default prefers the data it already holds over what the guest types at booking, because your CRM and enrichment data are usually more accurate. To control which source wins for a guest’s name or company, set the source priority on the Person object in Settings -> Objects. Form answers reach these variables through the contact record.Host and meeting variables
Host variables (Host first name, Host last name, Host full name, and Host email) fill from the profile of the meeting’s primary host. Meeting variables fill from the event itself. Meeting title uses the Event title from Event Details, or the event’s name when the title is empty. Meeting description uses the Description from Event Details, converted to plain text. Turn on Fallback title and description to protect the invite from blank variables. When any variable in the title or description resolves empty at booking time, Default replaces both with the Fallback title and Fallback description you set here. When the toggle is off, a blank variable renders as empty text, and a fully empty title falls back to the event’s name. Turn on Include calendar links in footer to add reschedule and cancel links below the calendar description. Invitees can then change the meeting straight from the invite.Notifications
Notifications are lifecycle messages. Default sends them when something happens to a booking.1
Add a notification
Select Add notification.
2
Choose a trigger
Choose a Trigger: On booking, On cancel, On reschedule, or On no-show.
3
Choose a recipient
Choose a Recipient: Guest or Host.
4
Pick the message
Pick the message template to send. Default sends it when the trigger fires.
Reminders
1
Turn on reminders
Turn on Enable reminders. Reminder rules only fire while Enable reminders is on.
2
Add a reminder
Select Add reminder.
3
Pick a template
Pick a reminder Template from your workspace’s library, or keep the Org default.
The rule now sends with the template’s timing.
SMS booking messages and compliance follow-up
Default can send SMS meeting messages to both recipients:- Internal user (host): message templates sent to employees for scheduling updates.
- External lead: message templates sent to bookers for booking lifecycle updates.
Text STOP).
Internal and external follow-up copy differs:
- Host copy: confirms they opted in as an employee of the organization.
- Lead copy: confirms they recently booked a meeting with the host at the organization.
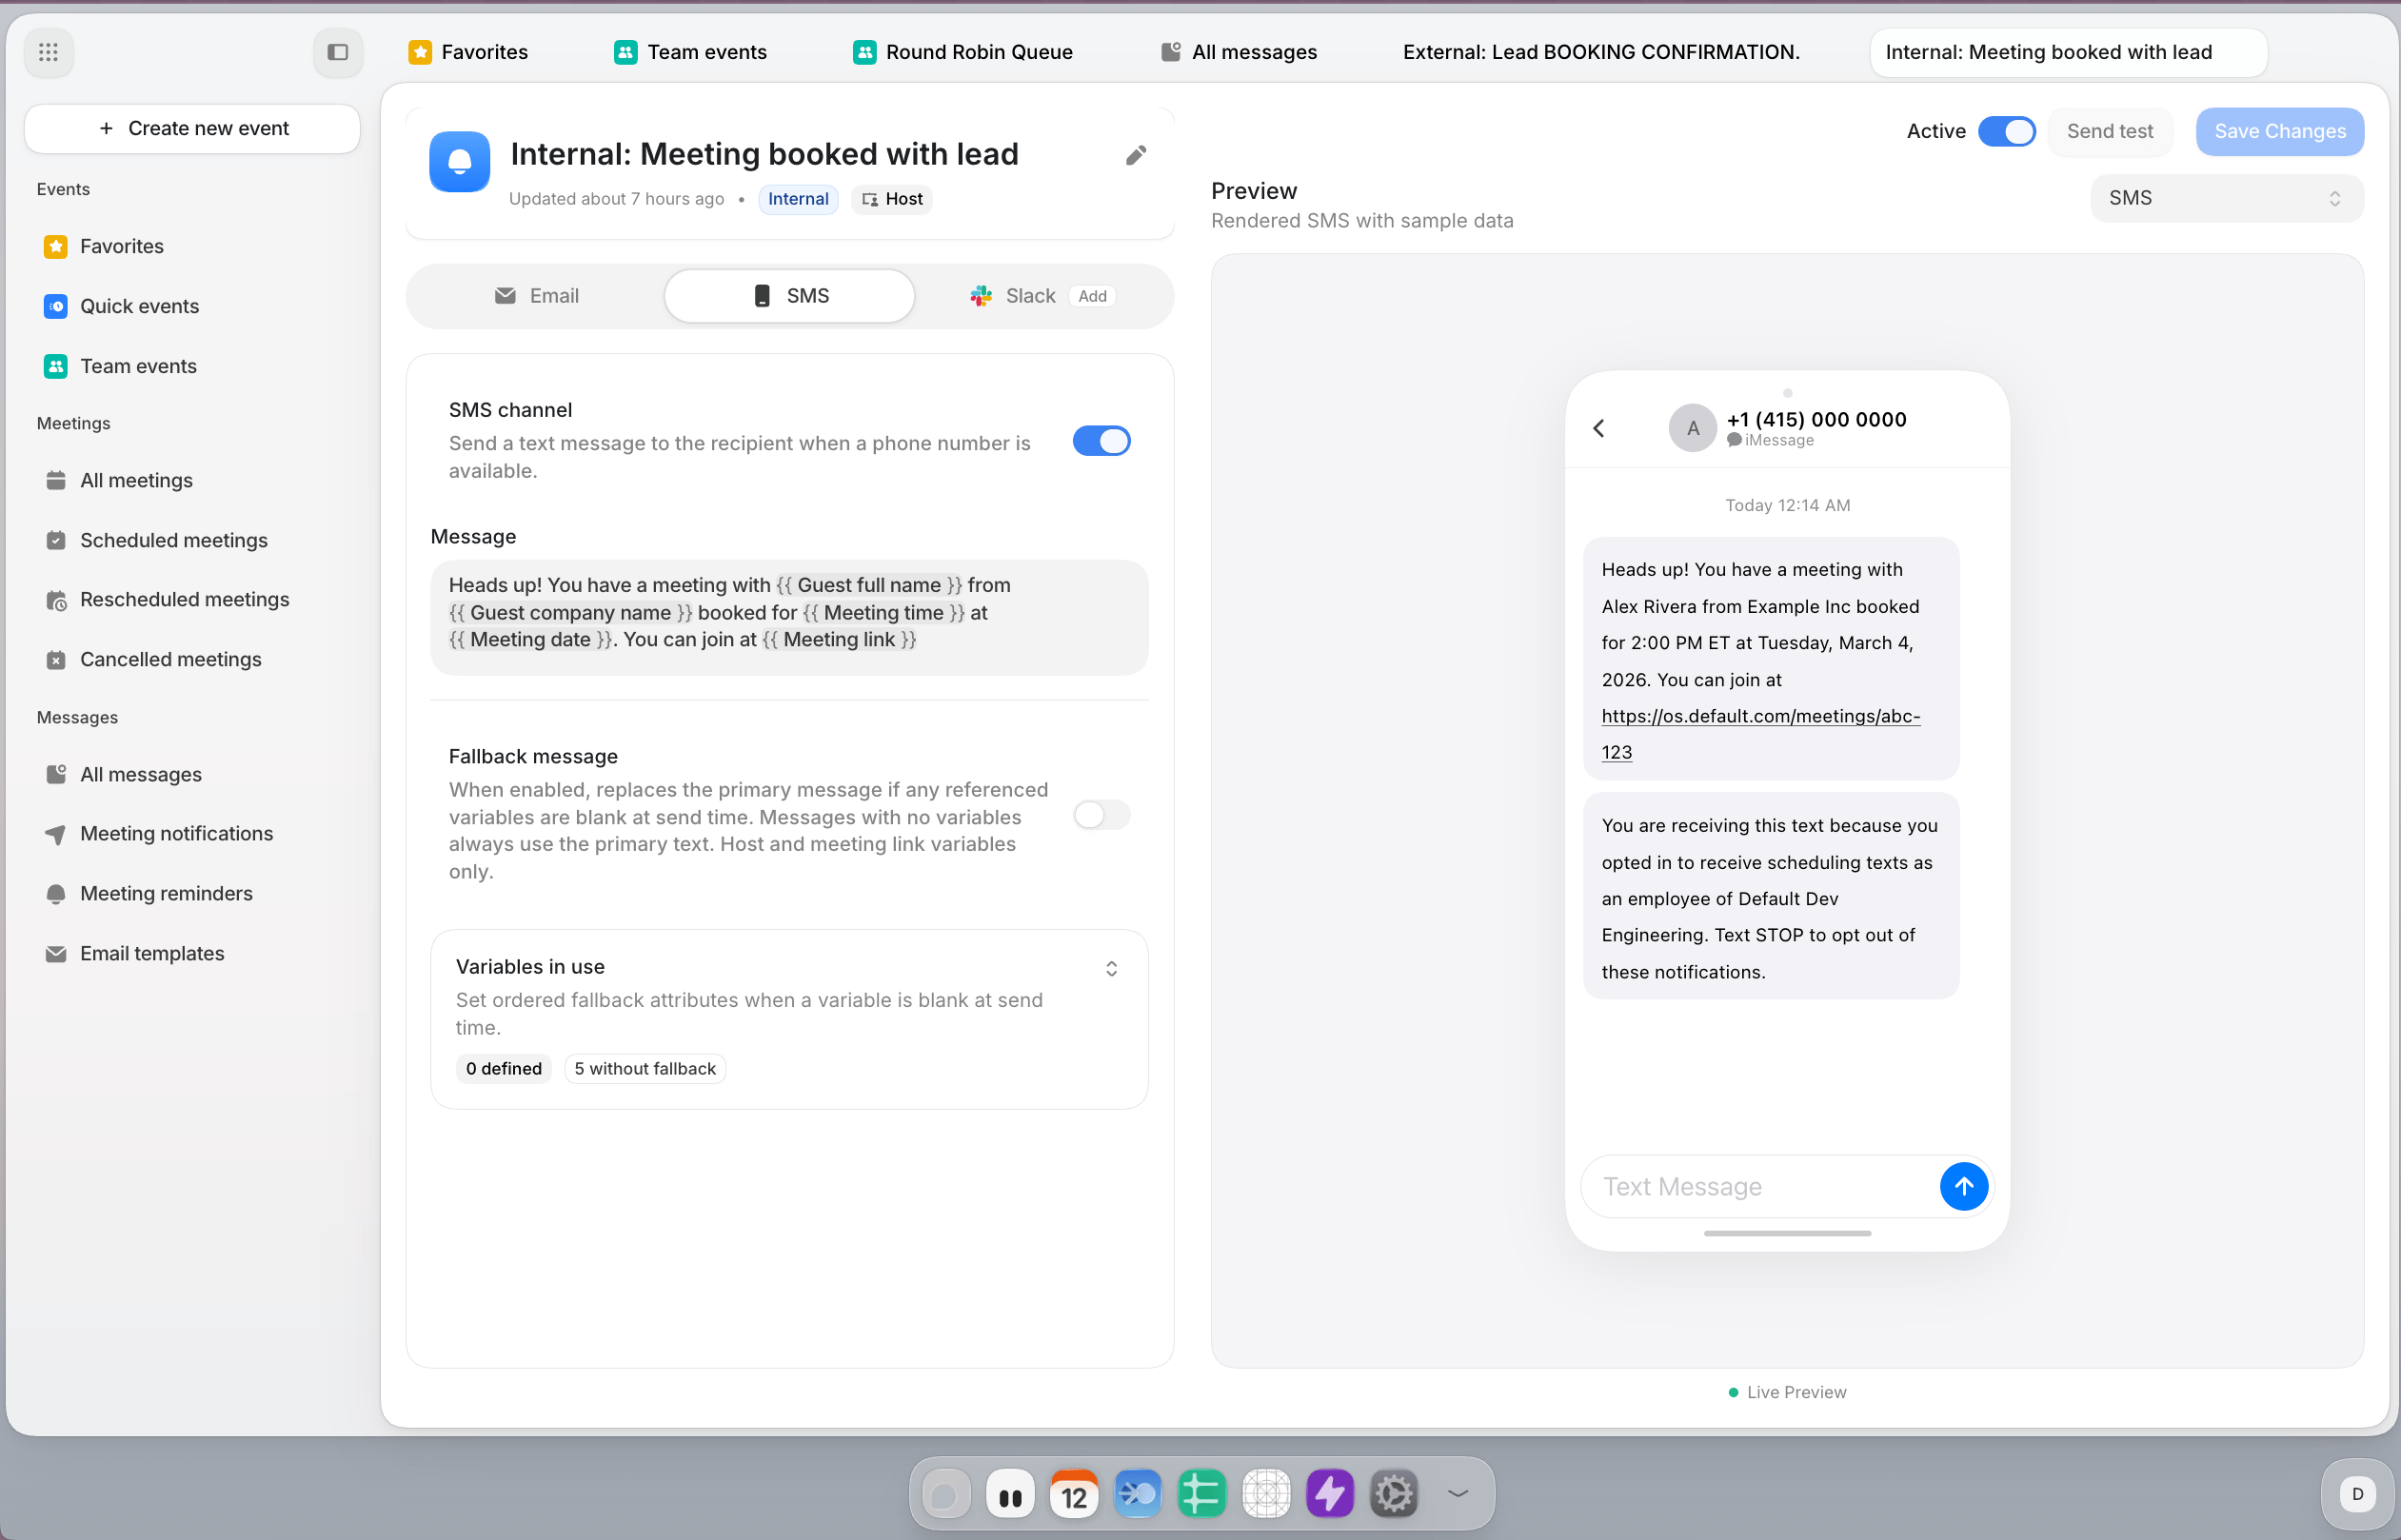
Internal (host) SMS message template with SMS channel enabled.
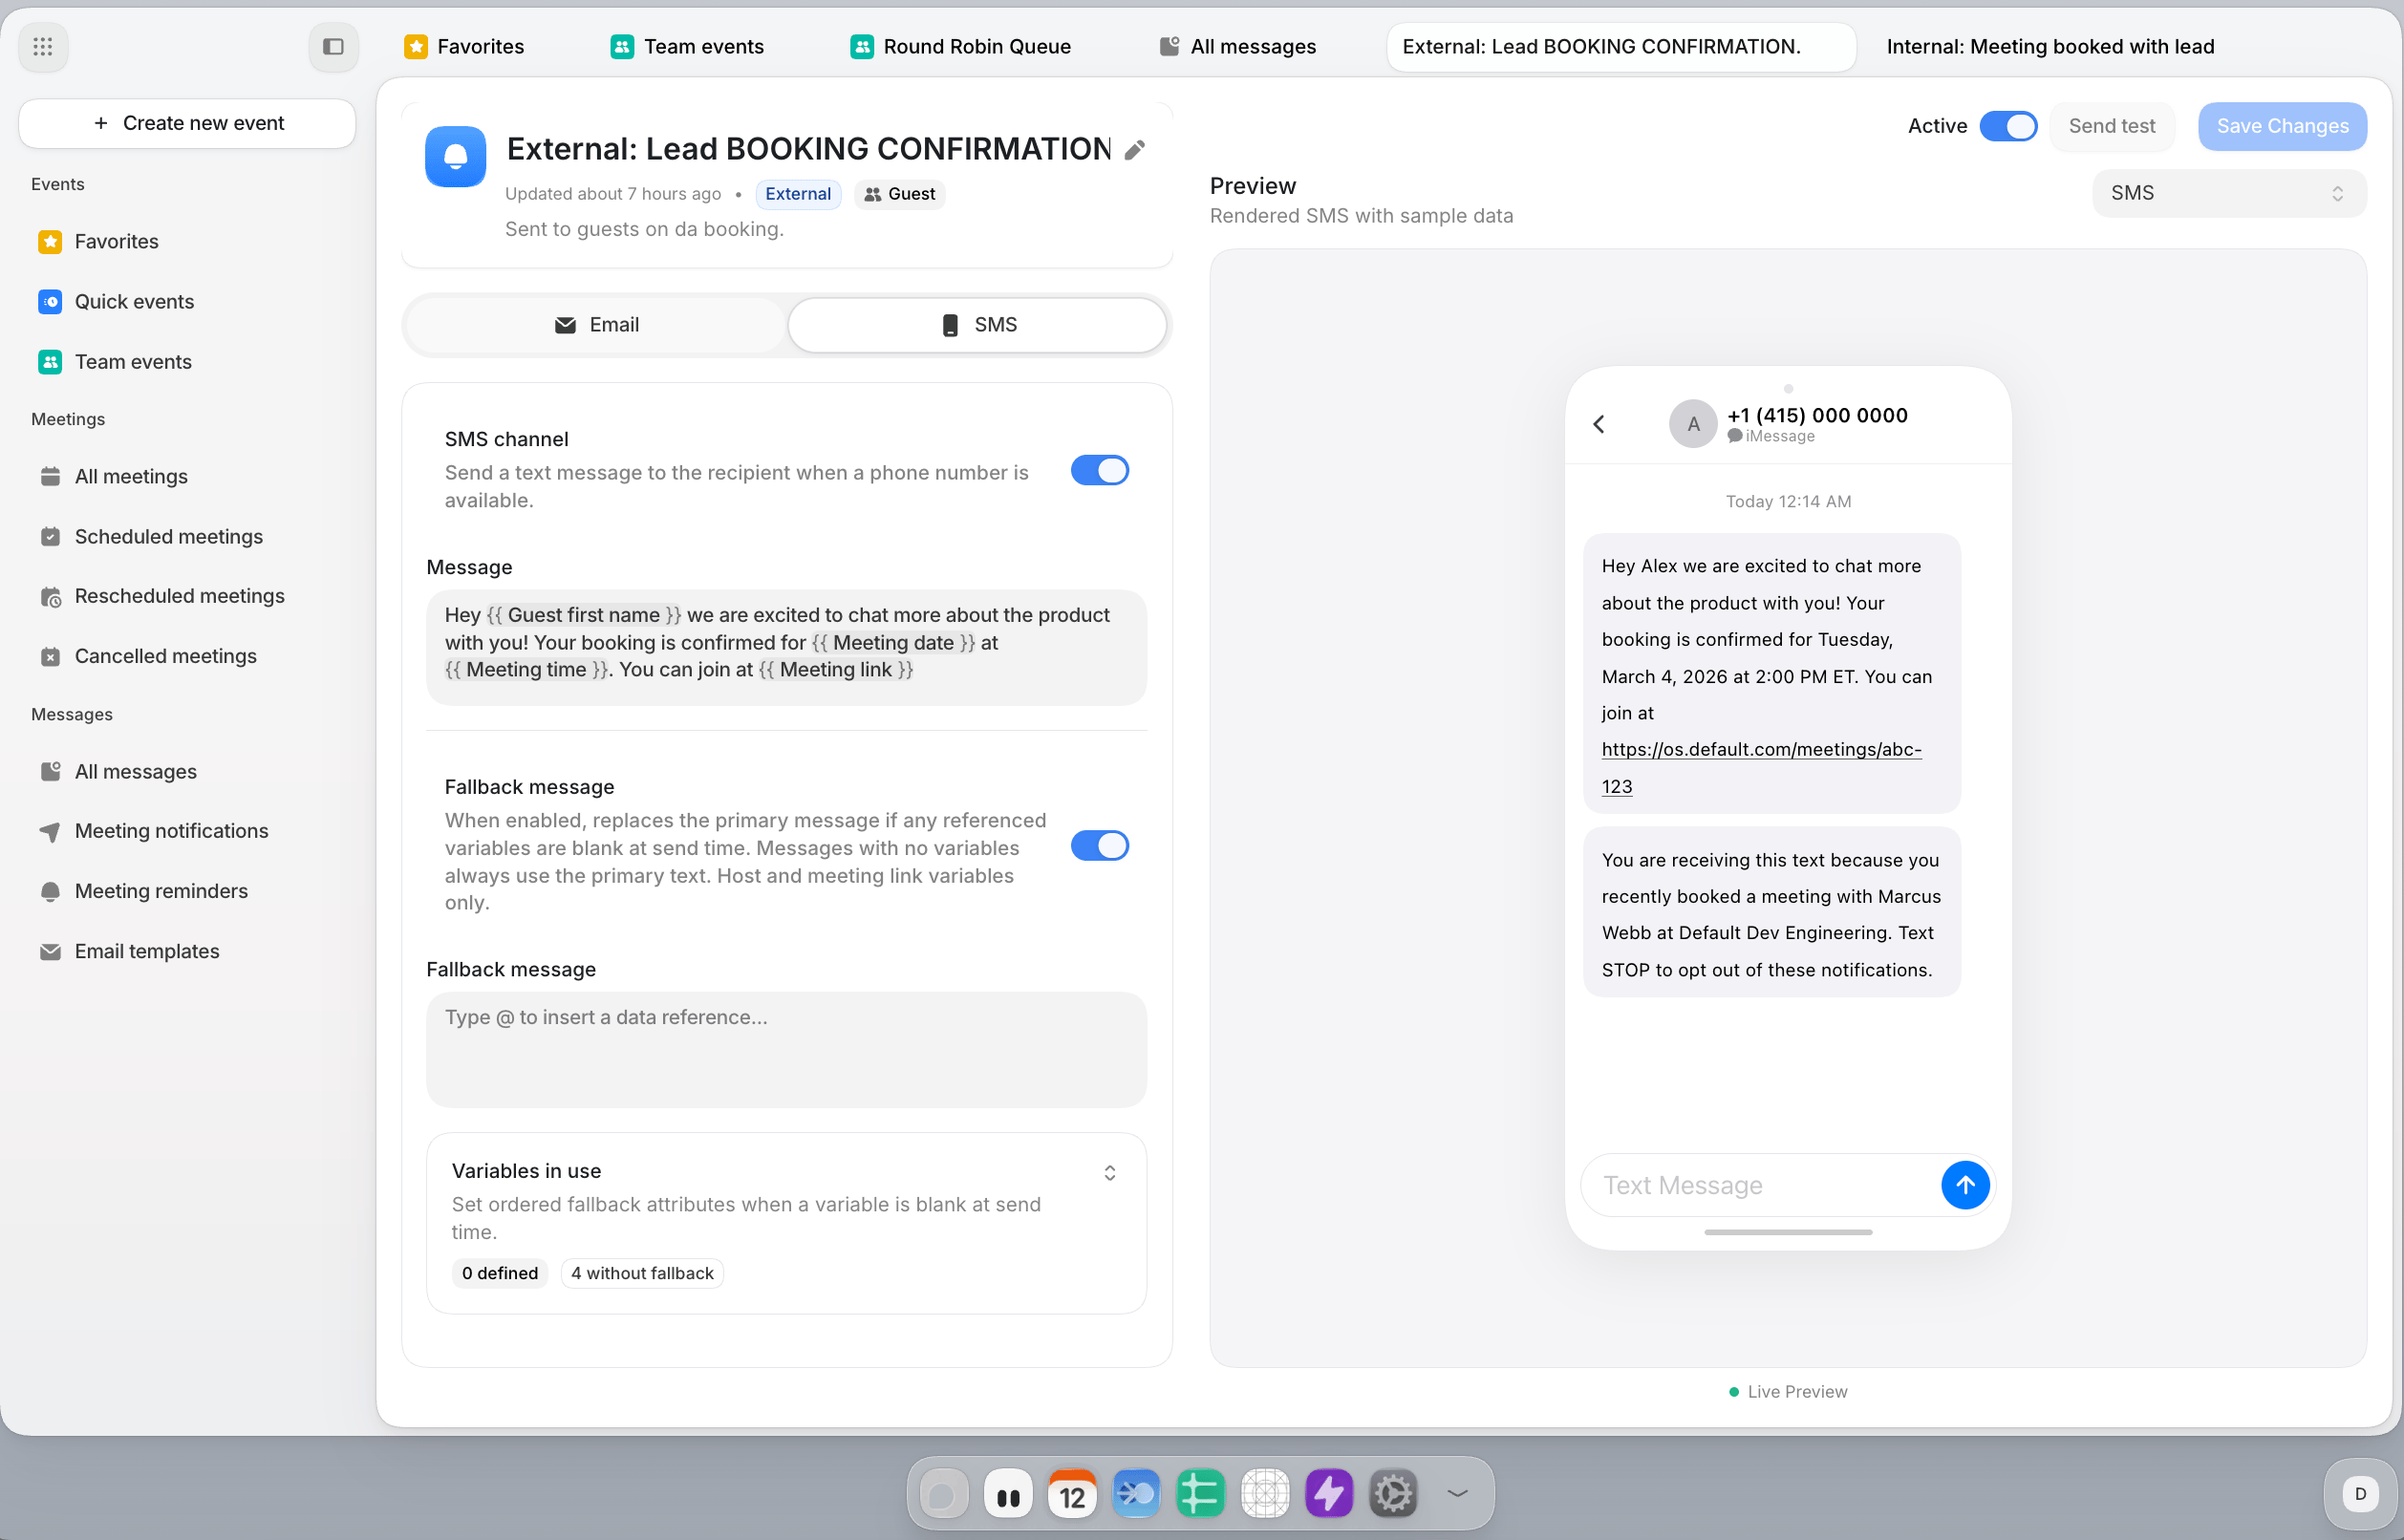
External (lead) SMS booking confirmation template with follow-up messaging.
Booking links
Booking links open in a Booking links drawer. Open it from the Booking links button on an event row, or from Copy Link in the event editor’s header.View and copy links
The drawer lists the event’s links in two tabs:- Permanent links keep working until you delete them.
- Expiring links stop working on their expiration date. The list shows when each link expires.
Create a booking link
1
Open the form
Select New in the drawer header. The drawer shows the New booking link form.
2
Set the expiration
Choose Permanent or Expiring. For an expiring link, pick the expiration date.
3
Choose the hosts
Add the members or queues that host meetings booked through the link.
4
Name the link
Enter a Link name. Optionally, set a Custom slug for the link URL.
5
Set the visibility
Choose Shared or Private.
6
Copy the link
Select Copy link. Default creates the link if needed and copies it to your
clipboard.